How to Set Up Kasa Smart Plug?
Key Takeaways
- Step 1: Download and Install the Kasa Smart App
- Step 2: Connect to Your Home Wi-Fi Network
- Step 3: Plug in the Kasa Smart Plug
Setting up a Kasa Smart Plug is a simple and straightforward process that allows you to control and monitor your smart devices with ease. In this article, we will provide you with a detailed guide on how to set up a Kasa Smart Plug step by step.
Step 1: Download and Install the Kasa Smart App
The first step in setting up your Kasa Smart Plug is to download and install the Kasa Smart app on your smartphone. This app is available for both Android and iOS devices and can be found in the App Store or Google Play Store. Once installed, open the app and create a new account or log in to your existing one.
Step 2: Connect to Your Home Wi-Fi Network
Before proceeding with the setup, make sure that your smartphone is connected to your home Wi-Fi network. It is important to note that Kasa Smart Plugs only support 2.4 GHz Wi-Fi networks, so ensure that your smartphone is connected to the correct frequency.
Step 3: Plug in the Kasa Smart Plug
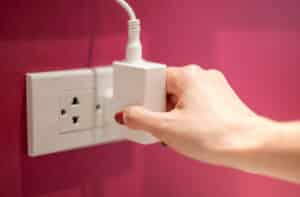
Take your Kasa Smart Plug and plug it into a power socket near the device you want to control. Ensure that the device is within the range of your Wi-Fi network for optimal connectivity.
Step 4: Add the Kasa Smart Plug to the App
Open the Kasa Smart app on your smartphone and tap on the “+” icon to add a new device. From the options provided, select “Add a Device” and then choose “Smart Plug.” This will initiate the setup process for your Kasa Smart Plug.
Step 5: Follow the Setup Instructions
Once you have selected “Smart Plug,” the Kasa Smart app will provide you with step-by-step instructions to complete the setup process. These instructions may vary slightly depending on your specific TP-Link Smart Plug model. Follow the on-screen prompts to power on the Smart Plug and wait for the Wi-Fi light to blink orange and green.
Step 6: Connect Your Phone to the Smart Plug’s Wi-Fi Network
For Android devices, the Kasa app will automatically connect your phone to the Smart Plug’s Wi-Fi network. However, if you are using an iOS device, you will need to manually connect to the Smart Plug’s Wi-Fi network through your phone’s settings. Go to Settings > Wi-Fi and select the Smart Plug’s Wi-Fi network from the list.
Step 7: Connect the Smart Plug to Your Home Wi-Fi Network
After connecting your phone to the Smart Plug’s Wi-Fi network, return to the Kasa app. It may prompt you about no internet connection, but you can ignore it and continue with the setup. The app will then provide you with a list of available Wi-Fi networks. Select your home network from the list or manually enter the network SSID and password if it is not listed.
Step 8: Name and Customize Your Smart Plug
Once the Smart Plug is connected to your home Wi-Fi network, you can give it a unique name and customize its icon in the Kasa app. This will help you easily identify and control the specific device connected to the Smart Plug.
Step 9: Configure Advanced Settings
The Kasa Smart app provides advanced settings that allow you to configure schedules, timers, and an away mode for your Smart Plug. These settings give you greater control over when and how your devices are powered, adding convenience and energy efficiency to your home.
Step 10: Control and Monitor Your Smart Plug
Once the setup process is complete, you can now control and monitor your Smart Plug through the Kasa app. Use the app to turn devices on or off, set schedules, monitor energy usage, and more. Enjoy the convenience and flexibility of managing your smart devices from anywhere using your smartphone.
Setting up a Kasa Smart Plug is a quick and easy process that allows you to enhance your home automation experience. Follow the steps outlined in this guide to get started with your Kasa Smart Plug today!
Related Websites:
FAQs:
Q: What is a smart plug?
A smart plug is a device that allows users to control their electrical appliances remotely. It provides the convenience of turning devices on or off using a mobile app or voice commands, even when you’re not at home.
Q: What are the features of a Kasa smart plug?
Kasa smart plugs offer various features and capabilities. You can control them through voice commands, create schedules to automate device usage, and monitor energy consumption. They are designed to be user-friendly and provide convenience in managing your appliances.
Q: How do I check if a Kasa smart plug is compatible with my devices?
Before purchasing a smart plug, it’s important to check compatibility. You can refer to general guidelines provided by the manufacturer to determine if the Kasa smart plug will work with your existing devices. If any compatibility issues arise, you can explore alternative steps or consult customer support for assistance.
Q: How do I set up a Kasa smart plug?
Setting up a Kasa smart plug is a straightforward process. After unboxing and preparing the device, you need to download the dedicated app related to the smart plug. Follow the step-by-step instructions provided by the app to connect the plug, configure its settings, and ensure it is connected to your Wi-Fi network.
Q: How can I troubleshoot common issues with a Kasa smart plug?
If you encounter any issues while setting up or using your Kasa smart plug, refer to the troubleshooting tips provided by the manufacturer. They usually cover common issues such as Wi-Fi connectivity problems or difficulties in using specific features. Additionally, you can consult the user manual or online resources for detailed instructions and support.

