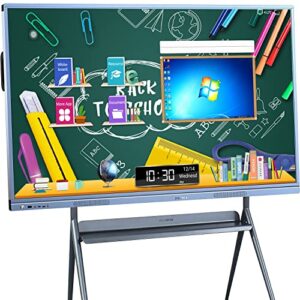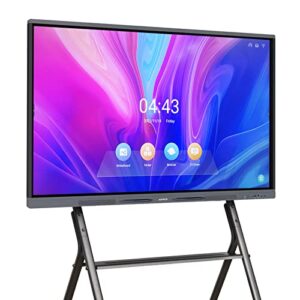
How to Calibrate a Smart Board?
Key Takeaways
- Calibrating a Smart Board is essential for accurate touch and writing functionality.
- Calibration procedures vary depending on the model and operating system of the Smart Board.
- Following specific instructions, installing necessary drivers and software updates, and checking for obstructions or reflections are important for successful calibration.
Calibrating a Smart Board is an essential step in ensuring accurate touch and writing functionality. Whether you are setting up a new Smart Board or experiencing calibration issues with an existing one, following the correct calibration procedure is crucial. In this article, we will provide you with a detailed guide on how to calibrate a Smart Board, covering different models and operating systems.
Calibrating a SMART Board M600 and M600V
If you have a SMART Board M600 or M600V, here are the steps to calibrate it:
- When you connect the interactive whiteboard for the first time, a pop-up bubble will appear on the screen. Press the “Please calibrate the SMART Board interactive whiteboard” message. If the pop-up doesn’t appear, you can manually access the calibration settings by clicking on the SMART software icon and selecting “SMART Settings > SMART Hardware Settings > Advanced > Calibrate”.
- Using a pen tray pen, press the first target on the calibration window and draw along the track until you reach the second target. Keep the pen in the track, regardless of where the digital ink appears.
- Lift the pen from the surface when you reach the second target. If the calibration window remains open, trace your pen around the track a second or third time until the calibration window closes.
- After completing the calibration procedure, an orientation screen will appear. Pick up a pen from the pen tray and touch the center of each target firmly with the tip of the pen until the target turns green.
- Repeat step 4 for all the targets on the orientation screen.
By following these steps, you can ensure accurate touch and writing functionality on your SMART Board M600 and M600V.
Calibrating a SMART Board 6000
If you have a SMART Board 6000, the calibration process is slightly different. Here’s how you can calibrate it:
- Open SMART Settings on your computer. The process for accessing SMART Settings depends on your operating system.
- Select the display you want to calibrate if you have multiple SMART products connected.
- Click on “Calibrate” and follow the on-screen instructions.
- A calibration screen will appear. Use a pen to press the red target and hold it at the center until it turns green, then lift the pen. The target will move to the next location.
- Continue pressing the targets until the second calibration screen and a grid appear.
- Use a pen to draw a spiral horizontally across the grid, completing each square.
- Wait until the calibration screen indicates that the display is operating correctly.
- Finally, orient the display by pressing the red targets that appear on the screen.
Following these steps will ensure accurate calibration and orientation of your SMART Board 6000.
Calibrating a SMART Board Interactive Flat Panel
For SMART Board interactive flat panels, such as the SMART Board 4000 and E70 series, the calibration procedure varies depending on the operating system. Here are the general steps:
- Resolve touch inaccuracy by configuring the settings before calibration.
- For Windows operating systems, open Control Panel > Tablet and PC Settings, select the interactive flat panel, and tap each crosshair as they appear.
- For macOS operating systems, press the Notebook icon, select SMART settings, and follow the on-screen instructions to calibrate the interactive flat panel. Ensure that you have installed the required drivers before calibrating on macOS.
- If any mistakes are made during the calibration process, repeat the calibration procedure.
- Clear the calibration data by clicking Reset if needed.
These steps will help you calibrate your SMART Board interactive flat panel for optimal performance.
Additional Tips for Calibrating a Smart Board
Here are some additional tips that apply to calibrating Smart Boards in general:
- Make sure to follow the specific instructions for your Smart Board model and operating system.
- Ensure that you have installed the necessary drivers and software updates for your Smart Board.
- Check for obstructions or reflections on the board’s surface that could interfere with the calibration process.
- Use a soft, lint-free cloth to clean the surface of the Smart Board if needed.
- If you encounter any errors or issues during the calibration process, contact your authorized SMART reseller for assistance.
By following these best practices, you can calibrate your Smart Board effectively and ensure optimal performance.
Related Websites:
FAQs:
Q: Why is calibration important for a smart board?
Calibration ensures accurate touch and pen input on a smart board. It improves responsiveness and precision, providing a better user experience.
Q: How do I prepare my smart board for calibration?
To prepare for calibration, clean the smart board surface using a soft, lint-free cloth to remove dirt, smudges, or fingerprints. A clean surface ensures accurate calibration.
Q: How can I access the calibration settings on my smart board?
You can access the calibration settings through on-screen menus or control panels. The exact method may vary depending on the smart board model. Refer to your device’s user manual for specific instructions.
Q: What is the process of calibrating a smart board?
Calibrating a smart board involves tapping or selecting specific on-screen targets and following the instructions provided by the smart board software. Be precise and deliberate during the calibration process for accurate results.
Q: How can I verify the accuracy of the calibration on my smart board?
Test the calibration by using various touch gestures and pen inputs on the smart board. Check for any discrepancies or misalignment in the touch response. If issues arise, consult troubleshooting tips or refer to your device’s user manual for assistance.